Bullets are an important was of making you blog posts more readable and scan-able.
Basic Bullets
Making a basic bulleted list is fairly simple using Gutenberg in WordPress.
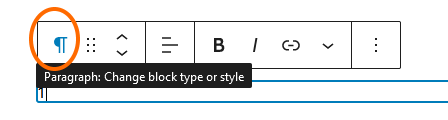
In your block menu, click the symbol at the far left (which will usually be the paragraph symbol).
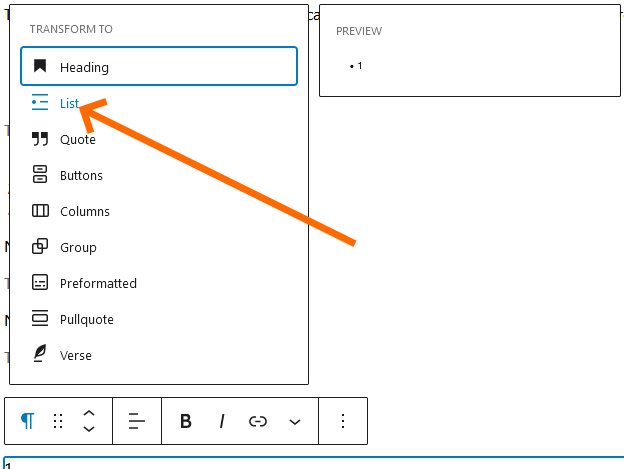
Select the “List” symbol.
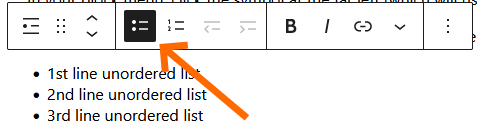
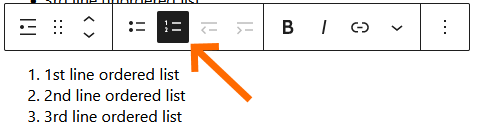
The default will be for unordered lists, you can switch to unordered list with the unordered list button.
New bullet entries
- 1st line unordered list
- 2nd line unordered list
- 3rd line unordered list
- 1st line ordered list
- 2nd line ordered list
- 3rd line ordered list
Nested bullets using Gutenberg UI
To make a nested bullet you will simply need to indent one of the bullets after the first bullet. When your cursor is on the bullet the Gutenberg menu will show an indent icon which looks like a line and an arrow.
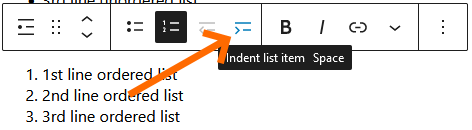
The indent menu item is disabled on the first bullet.
To reverse the indenting, you can press the outdent button.
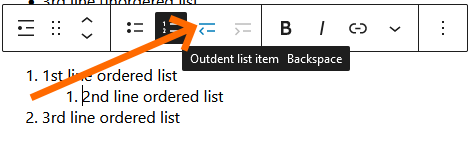
Alternatively, when your cursor is the beginning of the line you can press the space bar to indent or press backspace to outdent.
Nested bullets using HTML
More advanced users may choose to modify the bullets in “Edit as HTML” mode. Care must be taken that tags are nested properly and well formed.
<ul>
   <li>1st line unordered list</li>
   <li>2nd line unordered list</li>
   <li>3rd line unordered list</li>
</ul>
The nested bullet list has the same structure as the standard list above, except that it placed inside the required bullet item after the text.
<ol>
  <li>
     1st line ordered list
     <ol>
       <li>2nd line ordered list</li>
     </ol>
   </li>
   <li>3rd line ordered list</li>
</ol>
The type of nested bullet can be changed from an unordered list <ul> to an ordered list <ol> (and vice versa) by changing the HTML.
<ol>
  <li>
     1st line ordered list
     <ol>
       <li>2nd line ordered list</li>
     </ol>
   </li>
   <li>3rd line ordered list</li>
</ol>- 1st line ordered list
- 2nd line ordered list
- 3rd line ordered list
Using Custom CSS
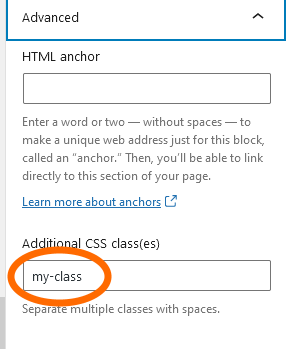
In the Block section, under Advanced, and “Additional CSS class(es) you can add one or more custom CSS class name. You can then define these classes in your style sheet or custom styles section within the WordPress user interface.
ul.my-class li {
	color: blue;
}
ul.my-class li ol li {
	font-weight: bold;
	color: black;
}
<ul class="my-class">
<li>1st line ordered list
<ol>
<li>2nd line ordered list</li>
</ol>
</li>
<li>3rd line ordered list</li>
</ul>- 1st line ordered list
- 2nd line ordered list
- 3rd line ordered list
HTML View